Home > Manage the Backup Scopes for Azure VMware > Create a New Backup Scope for Azure VMware
Download this articleCreate a New Backup Scope for Azure VMware
-
Go to the Backup page on the new UI.
-
Click on the Azure VMware service tile or click the More actions button on the upper-right corner of the Azure VMware service tile and click Configure backup scope from the drop-down list.
-
In the Configure backup scope for Azure VMware page, all the existing backup scopes for Azure VMware are listed in the table. You can use the search box to search for the backup scopes by name and manage the columns to adjust the view of the backup scopes.
-
Click the Create button. The Create a new backup scope panel appears.
-
In the Select Azure VMware Solution step, select your tenant from the drop-down list and select an Azure VMware solution.
-
Click Next.
-
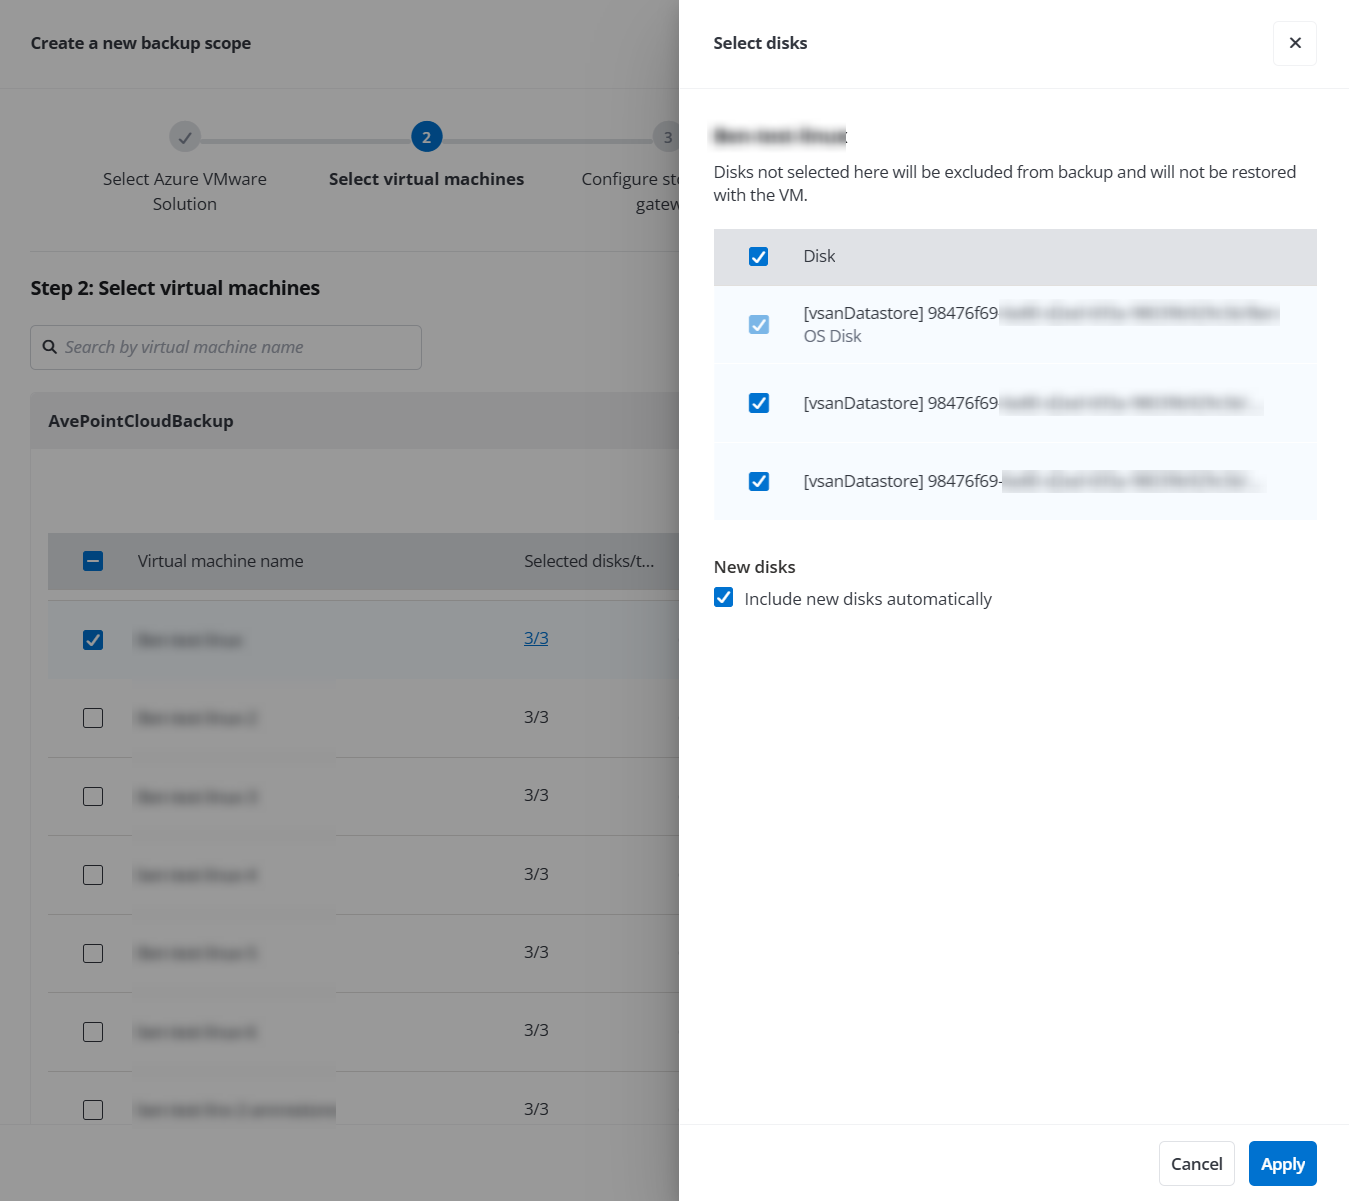
In the Select virtual machines step, select the virtual machines that you want to add to this backup scope and click Next. You can click the link in the Selected disks/total disks column next to the virtual machine name to select disks under the selected virtual machine to protect.
NOTEThe OS disk is mandatory and cannot be deselected.
-
Selecting the checkbox in the column header will select all the virtual machines on the current page. You can turn to the next page and select more virtual machines. Your selection will be kept, and the number of your selection will be displayed next to the tenants name.
-
In the Configure storage and gateway step, the storage profile is automatically set to default storage and cannot be changed. You can choose gateways from the CAP Gateway drop-down list as needed.
-
In the Settings step, complete the following settings:
-
Scope information - Enter a name and description for the scope you are creating. The description is optional.
-
Schedule - Click days, weeks, months, or years as the unit of time for the backup interval, enter a number in the text box after Every, and then configure the start time for your first backup job. By default, the backup job will run once a day. Backing up Azure VMware at the same time may cause traffic jams. You are recommended to configure backup schedules for different backup scopes at different times of the day and make sure the times do not overlap.
-
Notification - Check the notification profiles which will be applied to the backup scope.
-
Retention policy - Configure the retention period to keep the backup data in the storage.
-
Daily/hourly recovery point - Enter a number in the text box and select days or weeks from the drop-down list. The retention period must be between 7 and 28 days.
-
Weekly recovery point - Enter a number in the text box and select weeks or months from the drop-down list. The retention period must be between 2 and 12 weeks.
-
Monthly recovery point - Enter a number in the text box. The retention period must be between 1 and 12 months.
-
Yearly recovery point - If you are using AvePoint default storage with unlimited retention period, the Unlimited option is selected automatically. If you want to use custom retention period, select Custom.
-
-
-
Click Next to review your settings.
-
Click Save to save this backup scope. The backup for the Azure VMware virtual machines in this backup scope will roll out as scheduled. For more details about monitoring the backups, refer to Monitor Your Backup.